Dashboard Setup
This facility enables you to select exactly which Snapshots you want to appear on your Dashboard and in what order. There are over 25 individual snapshots and you can include up to 12 on your Dashboard.
This facility can be accessed from the Dashboard by clicking the Setup icon in top-right of the Dashboard as shown below :

The Dashboard Setup window is split into two lists. The top list displays all of the Snapshots that are presently included in your Dashboard. The bottom list displays all of the Snapshots that are not included but are available.
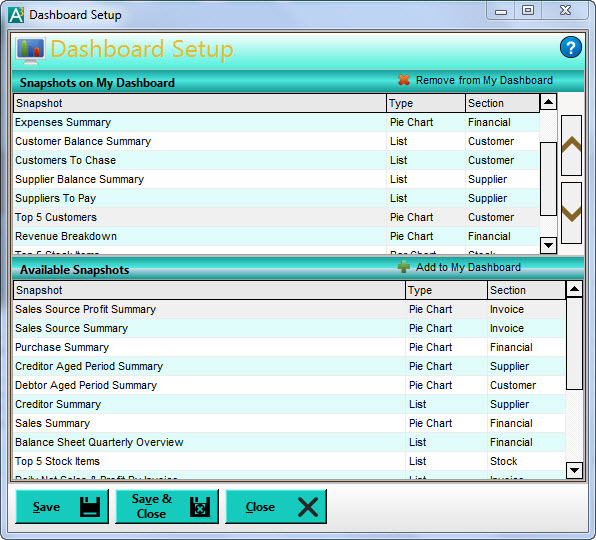
Both lists give you the name of each Snapshot, it's type and the section it is related to. Also displayed is a preview window which enables you to view what the highlighted Snapshot will look like. As you scroll through the Snapshots in either list, the preview is refreshed to show you the highlighted Snapshot along with a brief description about it.
Removing Snapshots From Your Dashboard
Your Dashboard is limited to displaying 12 Snapshots. As you may already have 12 Snapshots on your Snapshots on My Dashboard list you will need to remove one first before adding another one.
To do this you highlight the Snapshot that you want to remove from the list and either double-click it or click the Remove From My Dashboard link displayed in the top right of the list as shown below.

This will remove the selected Snapshot from the Snapshots on My Dashboard list and add it to the Available Snapshots list.
Adding Snapshots To Your Dashboard
To add a Snapshot to your Dashboard you should highlight the one that you want in the Available Snapshots list and either double-click it or click the Add to My Dashboard link on the top right of the list as shown below.

This will add the selected Snapshot into the top list so it will be included in your Dashboard after you have saved your changes.
Setting The Order Of Your Snapshots
In the top list of Snapshots you may want to set the order that they will be displayed on your Dashboard. It is important to note that Snapshots are displayed as standard on your Dashboard from left to right with three on each row. Therefore the first three Snapshots in the list will appear on the first row, the 4th to the 6th displayed on the second and so on.
On the right-hand side of the Snapshots on My Dashboard list are two vertical arrow buttons. To move a Snapshot to the position that want you should first highlight it in the list and then click either the up or the down arrow button to move it to the position that you want. As you click these buttons the Snapshot will be moved up or down one place in the list until it is placed in the position that you want.
When you have finished configuring your Dashboard you can click the Save button at the bottom to save the changes but remain in the Dashboard Setup window or click Save & Close to close the window immediately after saving.
Once your changes have been saved the Dashboard will be re-built to include your updated settings.