Aged Debtors Report
The Aged Debtors Report is used to provide a report of aged customer balances.
This option can be accessed by selecting Reports > Customer > Aged Debtors from the main menu and also by clicking the Reports button in the Customer section and selecting Aged Debtors.

In the Aged Debtors list the first column displays a Lookup (magnifying glass) icon next to each customer. This is used to lookup the selected customer's history to view their transaction activity. When you click the magnifying glass it invokes the same process as clicking the Lookup button in the Toolbar.
On the left hand side of the Aged Debtor list you have the range panel which is common to all reporting options in Avanti. This is where you specify the criteria for the customers you want to include in the list and report. When you have defined the criteria you want, you can hide this panel to expand the width of the Aged Debtor list by clicking the split-panel bar displayed between the range panel and the transaction list. You can click the split-panel bar again to show the range panel.
Customer From ... To
If you want to define a specific range of customers to include in the Aged Debtors list you can make changes to these settings. By default they are set the first and last customer references. Use the Look-Up icon (magnifying glass) in each box to find the customer you want.
Show All
This checkbox works in tandem with the other two settings in the Include panel. When this box is ticked the criteria defined in the other settings in the Include panel are ignored and all customers in the range are included. By default this checkbox is ticked. If it is unticked then the other settings in the Include panel are used to determine a criteria for which customers are included in the Aged Debtors list.
Include ...
This is used with the Above setting to determine a criteria for the Aged Debtor list. Click the drop-down button for a list of available options. For example if you select Balance from the drop-down list and the Above box is set to 100 then any customers with a balance of less than 100 will be excluded. Another example would be to only list the customers who have an aged balance of 90 days. You would therefore select 90 Days from the drop-down list and enter 0.00 into the Above box and the list will be refreshed based on customers who have a balance which is 90 days old. There are also options you can select which are not related the Above box. For example you can select to see only customers who have exceeded their credit limit or who have been placed On Stop.
Above
Used in conjunction with the Include ... setting, you would select an option from the Include ... drop-down list such as Balance or 30 Days or 90 Days etc and enter a value in this setting and the Aged Debtor list will refresh to only include customers with a balance above this value. For example if you only wanted to list customers who had 250 or higher in the 30 Days aged balance, you would select 30 Days from the Include ... list and enter 250.00 into this setting.
To remove the criteria defined in the Include ... and Above settings and display all customers you should tick the Show All checkbox.
Aged Balance Date
If you want to calculate your Aged Debtors report for a specific date you can enter the required date in this box. Enter the date you want to calculate your aged debtors for and the software will calculate the report at the specified date. This calculation may take a little time depending on the number of customers and transactions you have. A progress bar will be displayed to show you how long the calculation has to go. Once the aged balance calculation is completed the date-based balances will be displayed replacing the current balances in the report.
Toolbar
The Toolbar provides several buttons to carry out key tasks :
Lookup
Click the Lookup button if you want to bring up Transaction History report to view the transaction activity for the selected customer.
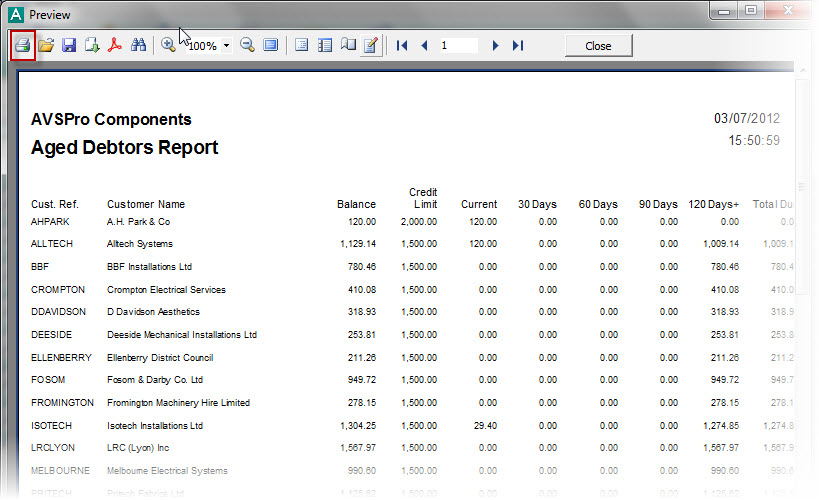
Click the Print button to produce the Aged Debtors report. The Print button is split into two parts. Click the main button to the left of the down-arrow and you can preview/print the default Aged Debtors report which does not include any contact details for the customers. If you want to include contact details in the report click the down-arrow part of the button on the right and you will be given a menu to select from (as shown below) and select the Include Contact Details option.

By default selecting to Print will show an on-screen preview for you to view the report and you can then print it from the Preview window. If you prefer that the software send reports directly to the printer when selecting a Print option then you will need to change the Preview All Reports Before Printing setting in the Reports & Documents page in Company Preferences. See Company Preferences for more information.
Click the Email button to send an email to a specified recipient with a PDF document of the report attached to it. As with the Print option you can click the down-arrow part on the right of the button to see a menu to select if you want to include customer contact details in the report or not. Once the report is produced you will be given an email window to enter the recipient's email address and the message you want to send with the report. See the Sending Emails page for more information.
Click the PDF button to export a PDF document of the report. As with the Print option you can click the down-arrow part on the right of the button to see a menu to select if you want to include customer contact details in the report or not. Once the report is produced you will be given an export window which enables you to make settings about how the want the PDF document exported and whether you want to open it after it has been exported. You can then select where you want to save it and to save it under a specific file name. See the Exporting PDF Documents for more information.
Export
Click the Export button to export the report in the format of your choice. As with the Print option you can click the down-arrow part on the right of the button to see a menu to select if you want to include customer contact details in the report or not. You will be given a menu of export options to select the format you want to export the report to. See Exporting Reports for more information.
Refresh
Click the Refresh button to refresh the list with information which may have changed elsewhere in the system since you opened the Aged Debtors option. You can also refresh the data in the list by pressing the F5 button on your keyboard when the list is selected.
Setting the Report Order
You can define the order in which the information on the report appears in the same way as you do in the on-screen list. You simply click the header of the column you want to sort by and this will sort the information for you in the list. The order settings on the list are then picked up by the report to sort the information on the generated report accordingly.
Customising The List
You can customise the list in various different ways including moving columns, sorting the list by a particular column, filtering the list based on your own criteria and more. See the Customising Lists section for more information. Any customisation you carry out on the list is saved, specific to you, so it will be displayed in the same way the next time you use the Aged Debtors report.
You can also access additional options by right-clicking on the list and a pop-up menu will be displayed. This is just another way to get at many of the options available in the Toolbar. The options at the bottom of the right-click pop-up menu, starting from Group By This Field, are standard options for all lists in the software (see Customising Lists for more information). The option at the bottom of the menu is Export which enables you to export all of the information in the list in several formats including Excel, CSV and HTML.