Financial Report Setup
This option is used to define the layout and structure of your financial management reports (Profit & Loss, Balance Sheet, Budget Vs Actuals). You do this by setting up groupings of accounts within each section of a report and specifying which accounts are included in each group. You can define as many layouts as you require if you need to produce financial reports in different ways.
To access this option select Reports > Financial > Financial Report Setup from the main menu or click the Reports button in the Financial section and select Financial Report Setup from the menu.

Report Structure
The tree list on the left-hand side of the window displays the structure of the report layout. The structure of the report is illustrated below :
Report
|
--> Sections
|
--> Groups
|
--> Accounts
You can expand a level to show the items in the level beneath it by clicking the plus sign next to it. Please note that the tree list only displays down to Groups. As you select a Group the accounts that are assigned to it are displayed in the list on the right.
The top two levels are the main reports, Profit & Loss and Balance Sheet. Click on the plus sign next to the relevant report to open up the sections of the report. Each report contains 4 Sections which are all static and cannot be added to or deleted. You can however rename the Sections if you require for example from Income to Sales or Overheads to Expenses etc. Below is a list of the sections included by default :
Profit & Loss
Income
Purchases
Direct Costs
Overhead
Balance Sheet
Fixed Assets
Current Assets
Liabilities
Equity
Please note : You can remove a Section from a report when it is printed simply by not assigning any groups or accounts to it in the setup.
Click the plus sign next to a Section to open up the Groups. Groups are entirely definable and you can have as many or as few as you require. The more Groups you have with fewer accounts in the more analysis is available when producing the reports by Group. Also account groupings are used elsewhere in the system to provide analysis for example in several Dashboard Snapshots.
Renaming a Section or Group
To rename a Section or a Group within a report simply double-click it or right-click it and select Rename from the menu. You will then be given a window to enter the new name and click OK to confirm the change. It is important to note that when you rename a Section on a report (provided it is for the default Standard Management Layout) then the name you choose will be reflected throughout the system as the Account Type for all accounts in that Section. For example if you rename the Income Section in the Profit & Loss report to Sales, whenever you see a list of accounts ie in the Financial section list or the Accounts List report, the Account Type will change to Sales for all Income accounts.
Adding a Group
To add a new group to a Section you must select and highlight either the Section you want to add it to or an existing Group in that Section. The Add Group button on the toolbar above the list will then become available and you can either the click this button or right-click on the Section in the tree-list and select Add Group.
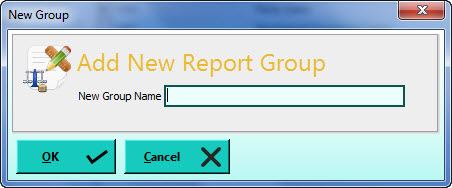
Enter your new group name into the window which is displayed and click OK to confirm.
Deleting a Group
To delete a Group from the report you must select and highlight the required Group. The Delete Group button on the toolbar above the list will then become available. You can either click this button or right-click on the Group and select Delete Group from the menu. You will then be asked to confirm that you want to delete the Group and you can click OK to delete it or click Cancel to abandon. Please note : when you delete a Group all of the accounts that are assigned to that Group are removed from the report layout and must be assigned manually to other groups in order to be included in your financial reports. Use the Check Layout button on the toolbar at the top of the window to check for any accounts which are not included in the layout.
Adding Accounts
The key element of defining your report layout is deciding which accounts are to be included in which Groups in the report. When producing your financial accounts your groupings will be used by default to display the balance totals for all accounts included in each Group and it is therefore important that the account balances are included in the totals of the Groups you would expect them to be. To add an account to a Group, select and highlight the relevant Group in the tree-list and click the Add Account button in the toolbar above the list. Alternatively you can right-click on the account list on the right-hand side and select Add Account from the menu. You can then enter the Reference of the account you want to add to the group or click the Lookup Search button (magnifying glass) to find the required account. Click OK when you have confirmed that you want to add the account. You will be given a warning if the software detects that there may be problems with adding the account into the specified group for example if the account is an Overhead account and you are trying to add it into the Income section etc. When the account is added you will see it included in the list of accounts in the group displayed on the right-hand side.
Removing Accounts
To remove an account from the report layout you should select and highlight the Group that contains the account and then select the relevant account in the list on the right-hand side. You can then either click the Remove Account button in the toolbar above the list or right-click on the account and select Remove Account from the menu. You will then be asked to confirm that you want to remove it from the report and click the Remove button to confirm or click the Cancel button to abandon.
Toolbar
The Toolbar at the top of the Financial Report Setup window enables you to access key tasks :
New Layout
If you need to set-up an alternative layout for your financial reports you can click this button. You will be given a window to enter a name for your new layout and also a drop-down box to select an existing layout if you want to copy it's details to your new layout. To select an existing layout to copy from click the down-arrow button or press Alt+DownArrow on your keyboard and select from the drop-down list. If you do not select a layout to copy from then your new layout will not contain any groups or accounts. You can then click OK to create your new report layout.

Edit Layout
Click this button if you want to rename your report layout.
Save
Click this button to save the changes you have made and continue editing your layout.
Save & Close
Click this button to save the changes you have made and close the window immediately afterwards.
Abandon
Click this button to discard the changes you have made and restore to the last saved details.
Check Layout
Click this option to run a check on the layout. This will display any issues with the layout which may cause problems when producing the reports such as accounts that are not included and accounts that are duplicated.
Changing The Layout To Edit
If you want to change to a different report layout to work on you can use the Financial Report Layout drop-down box displayed beneath the toolbar at the top of the window. Press the down-arrow button to select from a list of layouts you want to edit. Once selected the software will display the layout to work on.