Importing Data
Avanti offers the facility to import customer, supplier, product/stock information from CSV or tab delimited format text files which have been exported from 3rd party software including Excel.
The Data Import option is available by selecting File > Data Import from the main menu. From this option you will be given another menu to select which type of information you want to import. You can select to import Customers, Suppliers, Stock Items/Products or Product Groups.
Importing data into the software is done through the Data Import window which takes you step-by-step through the process. You move through the steps of the import wizard by clicking the Next button or clicking Back to go back a step.
Select the Import File
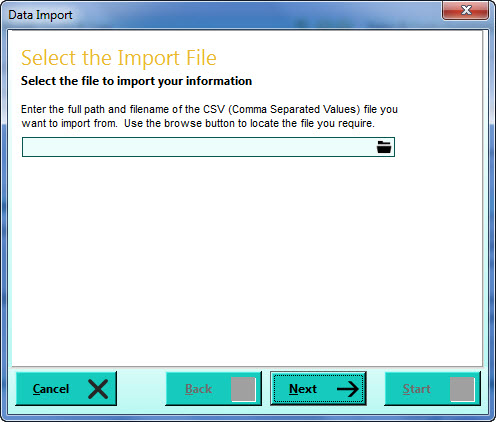
The first page asks you to locate the file which contains the data you want to import. Use the folder button to the right of the entry box to browse to find the file you want. Once the file is selected click the Next button.
Setup the Import Fields
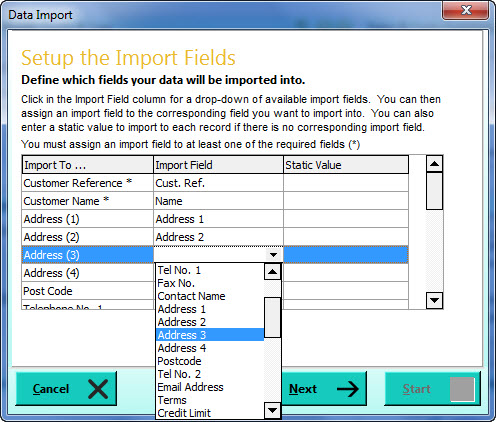
This page requires you to assign the fields from the import data to their corresponding fields in Avanti. In the left-hand Import To ... column are all of the available Avanti fields you can import into, depending on the type of data you are importing. The middle column, Import Field, is where you select the field or column from your import data that is to be imported into the corresponding Import To ... field on the left. The right column, Static Value, is used to enter a value that is to be imported into the corresponding Avanti field in cases where no Import Field is specified or where the value in the selected import field is blank.
The system reads the first record of your import file and assumes that these are column headers or field names and makes them available to select. To assign an Import Field to an Avanti field, click in the Import Field column for the row of the field you want to assign. This will then make a drop-down arrow available. Click this drop-down arrow for a list of all of the available fields in your import data to select from. Select the relevant import field from the list and it will be assigned against the respective Avanti field. The screenshot below shows an example of this when importing customer records.
You can repeat this for every relevant field you have in your import file. Any Avanti fields which are not assigned either an Import Field or a Static Value are not affected during the import and therefore you do not have to fill every field during import. The only required fields that you must assign an import field are displayed with an asterisk (*).
When you have assigned each of the applicable fields with their corresponding import fields or static values click Next to move to the next page.
Define Import Settings
This page enables you to make certain settings about how the data will be imported. Generally the default settings should be used however in special cases you can adjust them accordingly.
Fields Delimited By Tabs
The data import facility can import data in two formats, CSV (comma separated values) and Tab Delimited. The software will automatically try to detect which of these formats your data import file is and set this accordingly. If it recognises a CSV format file it will automatically untick this setting and may leave it unavailable to be changed. If the software detects a Tab Delimited format it will tick this setting but make it available to be unticked if required.
Import First Row Of Selected File
Generally the first row or record in an import file is used for the column headers or field names and you will not want to import this into the software. Therefore the default for this setting is unticked However in cases where an import file does contain an actual data record on the first row, you can tick this setting to ensure it is not missed out during import.
Overwrite Records With Identical References
When importing data, the system will check to see if the key reference (eg Customer Reference, Stock Code etc) on an import data record already exists on your data in the software. If it does then it's course of action will depend on the setting you make here. If you tick this setting the data import will overwrite the fields you have selected with the information contained in the selected import field. Please note that in doing this the import does not change every field on the record - only the fields you have explicitly selected to import. This is particularly useful if you just require to import price changes for existing stock/product records for example. If you untick this setting the software will skip the record altogether and make no changes.
Use Name Or Description For Blank References
Each record being imported must have a key reference (eg Customer/Supplier Reference, Stock Code etc) and an import field must be assigned to the key reference field. However in cases where the actual import field information for the key reference is blank or doesn't exist, the software must handle this. If you tick this setting, the software will attempt to create a reference for the record using the information contained in the corresponding name field (for customer and suppliers) and description field for stock items and use that auto-created value as the key reference for the new record. If you untick this setting then the record will not be imported.
Remove Special Characters
Special characters in import data such as double-quotes, single-quotes, commas etc can often cause problems and interfere with the processing of the import. By ticking this setting the software makes a pass of the data prior to import to remove all special characters which it considers unnecessary. A side effect of this, which you should be aware of, is this will remove all special characters which may be in the data for descriptive purposes eg double-quotes to represent inches, @ symbol to represent a location etc. If you untick this setting the initial pass will not take place and all special characters will be left intact and they may interfere with the software's ability to read your data during the import process and may cause some fields to be imported inconsistently
Remove Blank Records
Where there are blank lines or blank records in your import file, ticking this box will automatically remove them during the first reading of your import data. If you untick this setting the blank records will be included in the first reading but will be marked as invalid and will not be imported during the final import process unless data is manually entered.
Once you are happy with the settings you can proceed with the next stage of the import by clicking the Start button. You should note that clicking Start will not begin the process of physically importing the data in to the software. Instead it reads your import data and enables you to review the data before final import.
Once the software has read all of the information in your import data it will display a form listing all of the data and enabling you to review and to make any changes necessary.

This window enables you to see how the information from the import file will be imported into Avanti. It also gives you the opportunity to review the data, identify invalid records and also to manually makes changes to any records prior to final import.
The left-most column in the list is the Inc column. This has a checkbox for each record and is used to identify which records are to be included in the final import. By default all import records are ticked (provided they are identified as valid). This enables you to select if there are any records which have been read in that you do not want to include in the final import. Any records that you untick the Inc column for will not be imported.
At the top of the form you have various options including the facility to include all of the selected records or to exclude them all - useful if you want to then manually work through and tick off the one's you want to include. You also have the option to Reverse Selections, so all those marked to be included will be marked as excluded and vice versa.
The Status column displays either a tick or a cross to inform you of it's validation status. A tick in this column informs you it's been validated for import. A cross indicates it's not been validated. For an invalid record you can highlight it and in the panel beneath the list you will be given an explanation as to it's invalid status. If you wish you can then manually make a change to the relevant record in the list to correct the issue and then click the Validate Data button for the software to re-check the record's validation and mark it accordingly.
When you are ready to finally import your data into the software you should click the Import button. This will then begin the process of importing all of the records which are validated and are marked to be included. In the main Data Import window a status bar will show you to the progress percentage until the import process is completed.