Account Transaction History
The Account Transaction History option is used to view the transaction activity for a particular financial account, a range of accounts or for all accounts. From this option you can also print, preview, email and export to PDF a number of Transaction reports. The Transaction History option also gives you several options related to working with transactions including amending and undoing transactions and more.
You can access the Transaction History option by selecting Reports > Financial > History from the main menu or by clicking the History button in the Financial section. As this is a facility that you will find yourself using a lot to enquire about financial account transactions, there are various ways to access it throughout the system including from Look-Up and Drill-Down options.

On the left hand side of the Account History you have the range panel which is common to all reporting options in Avanti. This is where you specify the criteria for the transactions you want to include in the list and report. When you have defined the criteria you want you can hide this panel to expand the width of the transaction list by clicking the split-panel bar displayed between the range panel and the transaction list. You can click the split-panel bar again to show the range panel.
1) Date Range
Select the range of dates that you want to include transactions for. The Date From box defaults to the Start Date For Report Range setting in Company Preferences. The Date To box will always default to today's date (or the date you sign-in to the software with). All transactions dated outside this date range will be excluded. Use the down-arrow buttons or press Alt+DownArrow at the side of the date boxes to select a date from a pop-up calendar.
If you don't want to set criteria based on a date range you can click the Include All Dates link under the date boxes. This will refresh the transaction list to disregard any consideration for dates. This is useful if you want to locate a transaction which is not listed using a date range as it may have been entered on a date outside the standard date range settings. After clicking the Include All Dates you can return to using a date range by clicking the Use Date Range link.
2) Account
Account From ... To ...
Select the range of accounts you want include transactions for. The account range settings are always defaulted to the first and last account references. Use the Look-Up icon (magnifying glass) in each box to find the account you want. The account range is utilised dependant on the View setting in the Account panel (see point 5). If the setting is to view just a single account (as per the default) then the account range is utilised to limit the Previous and Next buttons in the Toolbar (see point 4) and to produce a report including just the accounts in the range selected. If the setting in the Account panel is set to View All then transactions for all of the accounts in the range specified here will be included in a single list on the screen and in any reports produced.
Account Type
If you want to set a range of accounts based on a specific type of account then you can use this option. Click the down-arrow button or press Alt+DownArrow on your keyboard to see a list of the available account types to choose from. By default All Account Types are included.
3) Include
The Include option is very useful to filter the list of transactions by type. For example if you just wanted to see customer invoices or journal entries etc. Click the down-arrow button or press Alt+DownArrow on your keyboard to see all of the options available and select accordingly.
4) Toolbar
The Toolbar provides several buttons which are used to carry out key tasks :
Lookup
The Lookup button is used to drill into specific information about the currently selected transaction in the list. The button is actually split into two parts, if you click the left-part of the button you will be taken to the default lookup option for the transaction. If you click on the arrow part of the button to the right you will be given a menu of the drill-down options you have available.

Transaction Details
Provides a lookup window displaying the basic details of the transaction. For non-document based transactions this is the default lookup option.
Journal Entries
Provides a lookup window displaying the journals recorded for the transaction enabling you to see a full breakdown of which financial accounts the transaction was recorded against.
Original Document
If the transaction was entered as a full sales or purchase invoice document then this option will display a window giving you all of the information about the original document including the stock items/products used, quantities, prices etc. For document based transactions this is the default lookup option.
VAT Breakdown
Displays a lookup window showing a breakdown of values by VAT rate on the selected transaction.
Options
The Options button provides a drop-down menu containing additional tasks that may be carried out on a selected transaction.
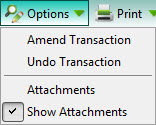
Amend Transaction
This option is very useful when you need to make changes and corrections on an existing transaction. When you select this option the software will check if there are considerations you should be aware of before you proceed for example if the transaction is marked as paid or allocated or if it has been reconciled in the Bank section. Once you confirm that you want to amend the transaction, the software will load the transaction details into the same option window as it was originally entered into and you can make the changes you require.
Undo Transaction
This option is used to completely remove the selected transaction from record. You will be presented with a window displaying the basic details of the entry and any considerations you should be aware of such as if the transaction is paid or allocated or has been reconciled in the Bank section. You can then choose to proceed with undoing the transaction or not.
Attachments
The Attachments option is used to add file attachments and web-links to the selected transaction. Selecting this option will open a window to enable you to add, view, open and remove attachments. See Attachments for more information.
Show Attachments
The Show Attachments option is used to select if you want to show a column in the transaction list to display which transactions have attachments. When Show Attachments is ticked then the attachment column is displayed on the left of the transaction list displaying a paperclip icon for all of the transactions which have attachments. If you select this option when no tick is displayed next to it in the menu then it will toggle the attachment column on. If you select it with the tick displayed in the menu then it will toggle the attachment column off. When displayed you can click this column for any transaction to add, view, open or remove attachments regardless of whether it already has attachments or not. You only need to select this option once to either turn on or turn off the attachments column as your setting will be saved for the next time you open this option.
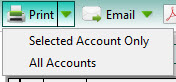
The Print button is used to produce a report for the selected transaction history. Similar to the Drill Down button, the Print button has two parts. The part on the left will print the default report and the part with the arrow to the right will display a drop-down menu of report options. The default report and the menu of options will depend on whether the setting in the Account panel (see point 5) is set to view a single account (the default setting) or if you have changed it to View All. If the list on-screen is presently displaying a single account's transaction then the default report will be to print the selected account's transaction history only. If you click the right of the button to get a drop-down menu you will also have the option to print All Accounts. If you have selected to View All the default report will be a list of all of the transactions in the selected range grouped by account. If you click the arrow part of the button on the right with View All selected you will also have the option to produce the report as a straight list of all transactions, not grouped by account, as per the list you see on-screen. The screenshots below show the two different drop-down menus you will get depending on whether you are viewing a history for a single account or have selected to View All in the Account panel (see point 5).

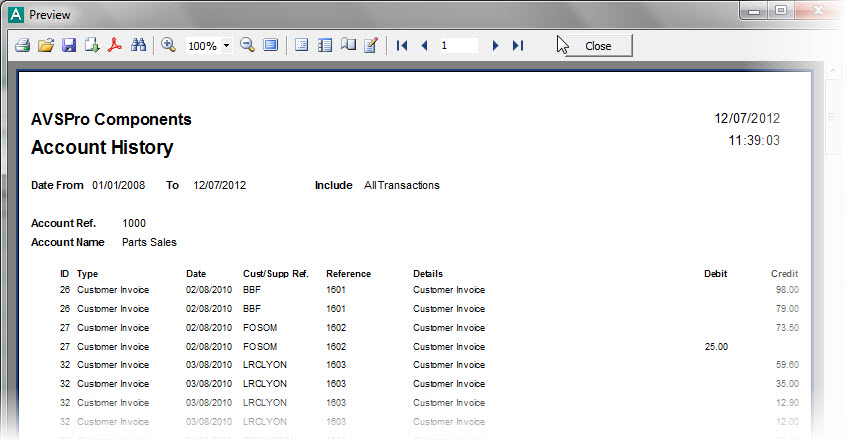
When you have selected the report that you want, the software will produce the report for you. y default the software will Preview the report it has generated on-screen first and you can then print the report from the Preview window. If you prefer that the software send reports directly to the printer when selecting a Print option then you will need to change the Preview All Reports Before Printing setting in the Reports & Documents page in Company Preferences. See Company Preferences for more information.
The Email button is used to send an email to a specified recipient with a PDF document of the report attached to it. In the same way as the above Print button, the Email button has two parts which determine which report is generated. See the information provided on the Print button for details. Once the report you require is selected and produced you will be given an email window to enter the recipient's email address and the message you want to send with the report. See the Sending Emails page for more information.
The PDF button is used to export a PDF document of the report. In the same way as the Print button, the PDF button has two parts which determine which report is generated. See the information provided on the Print button for details. Once the report you require is selected and produced you will be given an export window which enables you to make settings about how the want the PDF document exported and whether you want to open it after it has been exported. You can then select where you want to save it and to save it under a specific file name. See the Exporting PDF Documents for more information.
Export
Click the Export button to export the report in the format of your choice. In the same way as the Print button, the Export button has two parts which determine which report is generated. See the information provided on the Print button for details. Once the report you require is selected you will be given a menu of export options to select the format you want to export the report to. See Exporting Reports for more information.
Refresh
The Refresh button performs a refresh of the information on the list. This is useful if you have left the History report to enter or amend transaction data (or you are using the multi-user edition and another user has made changes to the data you are viewing) you can use the Refresh button to retrieve the changed information and display it on the list. You can also refresh the data in the list by pressing the F5 button on your keyboard when the list is selected.
Use the left and right green arrow buttons to move between accounts. Use the left arrow button to move to the previous account and use the right arrow button to move to the next account. ccounts are moved in Account Reference order. If you have set a different account range (see point 2) then these buttons will be restricted to move within the range you have defined.
5) Account Panel
The Account Panel shows the Reference and Name of the account which is currently selected and for which the transaction history is displayed in the list. You can select a different account to view by entering their Reference into the Account Reference box or by clicking the Look-Up icon (magnifying glass) on the right of the box to find the account you want.
To the right of the Account Name is a link which initially says View All. Clicking this link will change the list from displaying the selected account's transactions only to displaying transactions for all of the accounts in the specified range (see point 2). Once you have clicked the View All link, the account's reference and name will be removed and the link will change to View One Account. his view is useful where you want to see or report on all or a range of account's transactions rather than just one account. If you were then to click the View One Account link it would revert back to displaying transactions for the selected account only, the account reference and name will be displayed again and the link will be changed back to View All.
6) List Column Selector
There are many columns of information included by default in the transaction list provided. However there are several other columns which are available to be viewed but are not included by default. To add other columns to the list and, if required, to remove existing columns from the list you should click the button in the very top left-hand corner of the transaction list. This will drop-down a list of all columns.
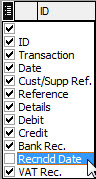
You simply need to tick the columns you want to add and untick any you want to remove. Some of the additional columns available are explained below :
Reconciled Date
This is useful when you want to see the date on which transactions were reconciled in the Bank section. This works in tandem with the Reconciled column which shows a tick for transactions which have been bank reconciled.
The columns you add or remove are saved automatically for you so they are used the next time you view this option.
7) Transaction List
Displays the list of transactions you have specified.
Setting the Report Order
You can define the order in which the information on the report appears in the same way as you do in the on-screen list. You simply click the header of the column you want to sort by and this will sort the information for you in the list. The order settings on the list are then picked up by the report to sort the information on the generated report accordingly.
Customising The List
You can customise the list in various different ways including moving columns, sorting the list by a particular column, filtering the list based on your own criteria and more. See the Customising Lists section for more information. Any customisation you carry out on the list is saved, specific to you, so it is displayed in the way you set it the next time you use the Transaction History option.
In the list the first column displays a Look-Up (magnifying glass) icon next to each transaction. This is used to drill-down to view more more information about the transaction. When you click the Look-Up icon it invokes the same process as clicking the Drill Down button in the Toolbar (see point 4).
You can also access additional options by right-clicking on the list and a pop-up menu will be displayed. This is just another way to get at many of the options available in the Toolbar. The options at the bottom of the right-click pop-up menu, starting from Group By This Field, are standard options for all lists in the software (see Customising Lists for more information). The option at the bottom of the menu is Export which enables you to export all of the information in the list in several formats including Excel, CSV and HTML.