Bank
The Bank section is the control-panel which enables you to view a list of all of your bank account and to access all of the features available for directly processing and reconciling bank or money related transactions.
You can access the Bank section by clicking the Bank option in the main Options Bar at the top of the Avanti application window.
Toolbar
The Toolbar gives you quick access to the main options in the Bank section.
The New button is used to create a new bank account in the software and the Edit button enables you to view and/or amend an existing bank account. See the Adding & Editing Bank Accounts page for more information.
The Receipt button is used to enter money received into a bank account. You can enter a direct receipt of money by clicking the main part of the button (see Bank Payments & Receipts). This enables you enter a Bank Receipt for money received from miscellaneous income etc which does not involve a Customer or Debtor account.
The Payment button is used to enter money paid from a bank account. You can enter a direct payment of money for expenses by clicking the main part of the button (see Bank Payments & Receipts). This enables you enter a Bank Payment for expenses which does not involve a Supplier or Creditor account.
The Batch Entries button is used to enter a batch of transactions in the same screen, line-by-line. Using Batch Entries you can enter Bank Payments and Receipts and Customer & Supplier Invoices, Credit Notes and Payments all in the same batch. See Batch Entry for more information.
The Transfer button is used to record money transfers between any of the bank accounts listed in the Bank section (including any cash accounts). See Bank Transfer for more information.
The Recurring button is used set up Recurring Entry templates for transactions which will be repeated on a regular basis, for example Standing Orders and Direct Debits etc. Recurring Entries can be set-up for Bank Payments and Receipts, Customer and Supplier Invoices and Payments and also for Journal Entries. See Recurring Entries for more information.
The Reconcile button is used to carry out a reconciliation on any bank account. This enables you match transactions in your accounting records with those on your actual bank statement and mark them as being reconciled in the software. See Bank Reconciliation for more information.
The History button is used to view and report on the transaction activity of your bank accounts. See Transaction History for more information.
Pop-Out Task Bar
The pop-out task bar is a quick and easy way to view and access all of the options available in the Bank section. You roll your mouse over the Options tabs on the left-hand side of the Bank section and after a second the panel will pop-up from the left and you can see all of the options available for you to select from. If you move your mouse away it will pop back into it's tab.
Bank Account List
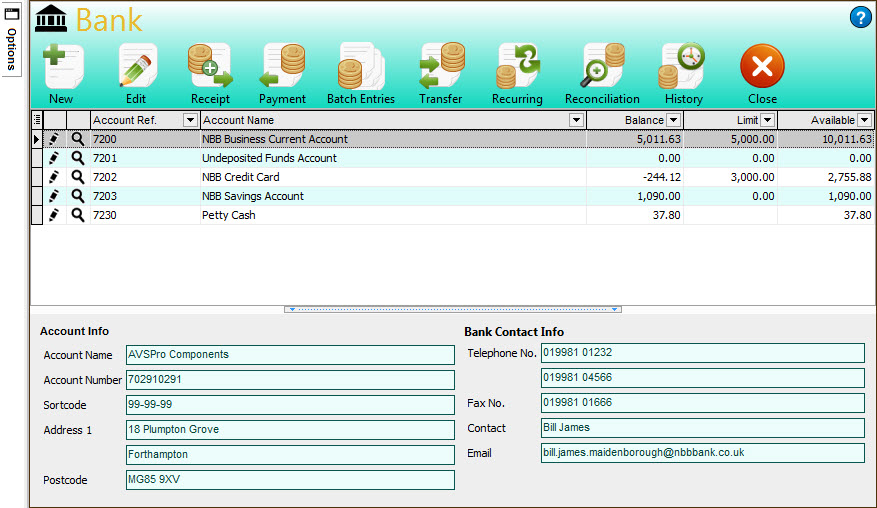
The main part of the Bank Section Displays a list of all of your financial accounts, listing the account references, names and balances.
You can customise the list in various different ways including moving columns, sorting the list by a particular column, filtering the list based on your own criteria, displaying more columns or hiding existing columns and more. See the Customising Lists section for more information. Any customisation you carry out on the list is saved, specific to you, so it is displayed in the way you set it the next time you use the Financial section.
In the list the first two columns display icons next to each account. The first is the Edit icon. Click this icon for the account you want to edit and the Edit Account window will be displayed. The next column shows the Look-Up icon (magnifying glass). This is very common in Avanti and enables you to drill-down or zoom-in to more specific information on the record you want. In this case clicking the Look-Up icon will show the History for the selected bank account displaying it's transaction activity.
You can also access additional options for the Bank section by right-clicking on the list and a pop-up menu will be displayed. This is just another way to get at many of the options available in the Customer section.
The options at the bottom of the right-click pop-up menu, starting from Group By This Field, are standard options for all lists in the software (see Customising Lists for more information). The option at the bottom of the menu is Export which enables you to export all of the information in the list in several formats including Excel, CSV and HTML.