Bank Reconciliation
This option is used to carry out a reconciliation on any bank account. This enables you match transactions in your accounting records with those on your actual bank statement and mark them as being reconciled in the software.
To access this option select Tasks > Bank > Reconcile from the main menu or click the Reconcile button in the Bank section.

The process of reconciling your bank transactions is very straightforward. You first of all select the bank account you want to reconcile using the Bank Ref box underneath the toolbar. The default bank account will be displayed initially when you open the option (see Control Accounts in Company Preferences for how to set the default bank account). Click the down-arrow button or press Alt+DownArrow on your keyboard to drop-down a list of available accounts and select accordingly. Once a bank account is selected, it's name will be displayed and the transaction list will be loaded with all of the transactions that have not yet been reconciled for the bank.
To reconcile transactions you simply tick the box under the Rec column next to each transaction that you reconcile. To drill-down and find out more information about any of the transactions listed you can click the magnifying glass icon next the relevant transaction.
As you reconcile transactions there are total figures that change to reflect the reconciliation values. These are explained below :
Opening Balance
This displays the balance in relation to the transactions that have previously been reconciled and represents the closing balance from your last reconciliation.
Uncleared Items
These totals represent the total of the transactions listed which have not yet been reconciled. The figure under the Receipt column represents the total value of money received which have not been reconciled. The value under the Payment column represents the total value of money paid which has not been reconciled. The figure displayed under the Balance column represents the total value of all of the unreconciled transactions.
Reconciled Balance
This figure represents the balance of the account based upon the transactions you have reconciled. This changes as you reconcile and unreconcile transactions. At the end of the reconciliation process, provided you have reconciled all transactions listed, it should equal the Account Balance which is displayed beneath.
Account Balance
This is the actual balance of the selected account. This represents the current balance regardless of the reconciled status of transactions. You are ideally aiming to get the Reconciled Balance to equal the Account Balance so that every transactions is reconciled.
Adding Transactions During Reconciliation
You may find during the reconciliation process that you need to add transactions that are on your bank statement but not in your records for example bank charges etc. There are two ways to do this. Click the Adjustment button on the toolbar at the top of the window. This will open up the Bank Payment & Receipt option for you to enter your adjustment transaction. If your new transaction needs to be entered through another option such as Customer or Supplier Payment then you can select the relevant option in the software to enter your transaction and once entered go back to the Reconciliation window and click the Refresh button on the toolbar. This keeps all of the work you have done so far in reconciling your bank account and adds any new entries to the list in order to reconcile them.
Toolbar
The options at the top of the window enable you to carry out key tasks for the reconciliation :
Save
Click the Save button to save the reconciliation and continue working on it.
Save & Close
Click Save & Close to save the reconciliation and to immediately close the window.
Abandon
Click the Abandon button to discard the work in this reconciliation and start again. You will be asked to confirm that this is what you want to do before proceeding.
Adjustment
The Adjustment button is used to enter bank payments or receipts during the reconciliation process. If you enter a transaction using this button ensure you click the Refresh button to add the new entry to the transaction list to be reconciled.
Reverse
Click the Reverse button is you want to mark all transactions that are presently unreconciled as being reconciled and vice versa.
Refresh
Click Refresh to reload transactions from your accounts into the list. This will not affect the work you have done so far in the current reconciliation session however it is useful if you have entered transactions elsewhere during the session to load them straight into the reconciliation list.
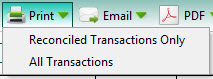
The Print option enables you to print a report of the transactions involved in the reconciliation. This gives you the option to select from printing all transactions or just those that you have reconciled. Select accordingly.

The Email option enables you to email a report of the transactions involved in the reconciliation to a selected recipient (see Sending Emails for more information). As with the Print button you can select from printing all transactions or just those that you have reconciled.
The PDF button is used to export a PDF document of the report. In the same way as the above Print button, the PDF button gives you a menu to select from printing all transactions or just those that you have reconciled. Once the report you require is selected and produced you will be given an export window which enables you to make settings about how the want the PDF document exported and whether you want to open it after it has been exported. You can then select where you want to save it and to save it under a specific file name. See the Exporting PDF Documents for more information.
Export
Click the Export button to export the report in the format of your choice. In the same way as the above Print button, the Export button gives you a menu to select from printing all transactions or just those that you have reconciled. Once selected you will be given a menu of export options to select the format you want to export the report in. See Exporting Reports for more information.
When you save the reconciliation, all the transactions which have been reconciled are marked permanently as being reconciled. Each is also stamped with the date on which they were reconciled. In the Account Transaction History you have the option to add the Reconciled Date to the list so you can see not only whether a transaction has been reconciled but on what date it was reconciled.