Quick Print & Email
This option is used to print a single transaction or a selected list of transactions quickly and easily. This option can also used to email, preview and export documents to PDF.
To access this option you can click on the printer icon or the envelope icon (for quick emailing) to the left of each transaction in the Sales section list (see Sales section). You can also right-click in the Sales section list and select the Print and Email options from the pop-up menu.

There is no facility to select which transactions you want to print in this option and it will print the transaction or selected list of transactions that you selected in the Sales section or other options from where you called this option.
One of the powers of the Quick Print facility is the ability to print or email multiple transactions from a selected list. The list of transactions you want to print (or email) must be selected using the Multi-Select facilities in the Sales section before selecting this option. The selected list of transactions will then be passed to this option to be printed, emailed or exported. Where a list of transactions is selected you will see them displayed in the window caption as shown below :
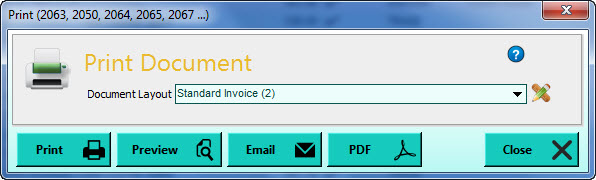
Document Layout
Select the document layout that you want to use to produce the document for the selected transaction(s). Click the down-arrow button or press Alt+DownArrow on your keyboard to see a list of the available document layouts and select accordingly. You can have as many different document layouts as you require for different purposes or for different circumstances etc. A common alternative document layout can be used to print delivery notes.
If you have selected to use a specific document layout for the customer or supplier that you are printing documents for, that layout will be used as the default document layout (see Customer Details for how to define a default layout for a customer). If the customer you are printing documents for does not have their own specific document layout defined for them or you are printing for more than one customer then the software will use the default document layout set for the company you are using (see Document Designer to setup default layouts for each company). If you have not defined a default layout for the company, the software will use the document layout that you last used.
When you have selected the document layout that you want to use, if you need to make on-the-fly changes to the page layout, you can click the layout icon to the right of the layout selection box and the document page designer will open for you to make any necessary changes to your chosen document layout such as adding your company logo or a new field. If you want to add more layouts you can use the Document Designer facility.
When you have selected the document layout that you want to use you have several buttons at the bottom of the window which give you the available options for what you want to do next. Please note : If you have selected an option to access the Quick Print facility to carry out a specific process eg Email then only the button for the chosen function may be displayed.
Click the Print button to send the selected transaction or list of transactions directly to your chosen printer.
Preview
Click the Preview button to view the transaction(s) in a preview window first. You can then print the document(s) from within the Preview window.

Click the Email button if you want to email the transactions or list of transactions directly to your customer(s) or to email them to a specified recipient. If you are emailing multiple transactions you will be given a window to select if you want to send them all to the relevant customer's email addresses or to send them all in a single PDF document attachment to an email address that you supply.

Tick the relevant checkbox that you want and click OK to proceed or Cancel to abandon the procedure. You can use the Template button to change the email template that will be used to generate the email messages which are sent with the document attachments. For more information see the Email Template page. Email message templates are not used when emailing multiple documents to a single email address.
If you have selected to send each document separately to each relevant customer then the system will generate all of the relevant PDF documents and attempt to send them to the email addresses on the customer's records (using the email settings defined - see the Email section in Company Preferences). You can define precisely which email address(es) for each customer are used by specifying which contact(s) on each customer will receive their documents. See Contact Details for information on setting up contacts. As the software raises and sends the emails, you will be shown a progress bar to indicate how many emails have been sent. Once completed you will be given a message informing you that the process was completed. This message will either tell you that all emails were sent successfully or how many were sent and how many were not. Generally emails that are not successfully sent are due to no email address or an invalid email address being specified on the customer record.
If you have selected to send all of the documents to one email address you will be shown an email window to enable you to enter the email address(es) you want to send the documents to along with the message you want to send. See Sending Emails for more information.
If you are emailing a single document to a customer you will be asked to confirm or enter their emails address and recipient name. Enter the relevant details and click OK to proceed with sending or click Cancel to abort the procedure. You will also be given a button to Edit/View Email which enables you to view and, if required, to change the email details and also to attach any additional files which may be required.
Click the PDF button if you want to export the transaction or list of transaction as PDF document(s). If there are more than one transaction then you have the choice to export them either as individual documents or to include all of them in a single PDF document. In this case, similar to the Email option, you will be given a window to select how you want to export the documents. If you select to export to a single PDF document or are exporting a single transaction you will be given an export window which enables you to make settings about how you want the PDF document exported and whether you want to open it after it has been exported. You can then select where you want to save it and to save it under a specific file name. See the Exporting PDF Documents for more information.